Intro
I’ve been teasing a longer post for a while detailing my PixInsight workflow. I’ve decided to build this a page rather than a series of posts so that I can update it as I find different or better ways of processing data. This will also keep it better organized as I build out the details and explanations, and maybe link some videos.
By way of introduction, I was a resistant convert to PixInsight. This was for two reasons, the cost and the steep learning curve. I had originally done a free trial with some of my first photos, and PixInsight can be somewhat unforgiving with poor quality subs. I struggled to stack, and the trial expired without me really understanding what I was doing. I started using Siril, which is a much easier to learn program, and one I still quite like. However, as my skills and equipment improved, it was clear my processing was holding me back. I read several people on message boards saying that switching to PixInsight was the single greatest overall improvement in their astrophotography. After a few weeks with PixInsight and some other tools, I’m firmly in that camp.
- Intro
- PixInsight Configuration
- Pre-Processing Details
- Background Extraction
- Star Clean Up & Removal
- Stretching
- Noise Reduction
PixInsight Configuration
The workflow I’m going to describe is based on PixInsight version 1.9.2 with the following plugins. All of them are free except for the RC Astro Xterminator plugins. The RC Astro plugins really are best in class and in my opinion are worth the money. All of these plugins can be added by adding the relevant repositories to the update manager in PixInsight, and then they will install automatically.
- RC Astro – BlurXterminator, NoiseXterminator, and StarXterminator. There is a free alternative to StarXterminator, StarNet++; in my opinion it is not quite as good, but it is a serviceable alternative for many situations.
- Generalised Hyperbolic Stretch.
- PixInsight Toolbox by iDeviceApps
- The Seti Astro tools.
- Narrowband Normalization by Cosmic Photons.
- GraXpert for background extraction
Pre-Processing Details
I use Weighted Batch Pre-Processing script with the default values. I’ll work the example of the Crab Nebula. I’ll share the raw files as well as the stacked master in case anyone wants to follow along with the same data in my Google Drive.
Background Extraction
The first step is to apply the background extraction. I generally try this two ways, with the new PixInsight tool, MultiScale Gradient Correction, and with GraXpert. GraXpert is free and quite good, but when MSGC tool works, it’s amazing. I haven’t entirely figured out why, but on some image stacks I just can’t seem to get a good result out of the MSGC, and for some areas of the sky the reference database isn’t complete, so there is value to doing both ways.
For both tools, here is the process:
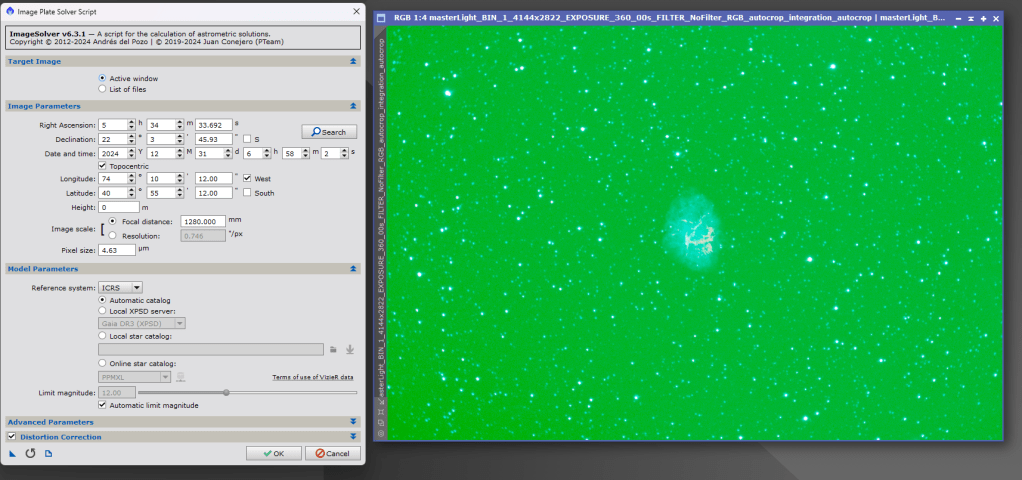
Open the stacked image and apply the auto stretch. The image will be very green at this point. Image Solver Script to attach an exact astrometry solution to the image. If you’ve set up your capture software correctly, this tool should run with just the defaults.
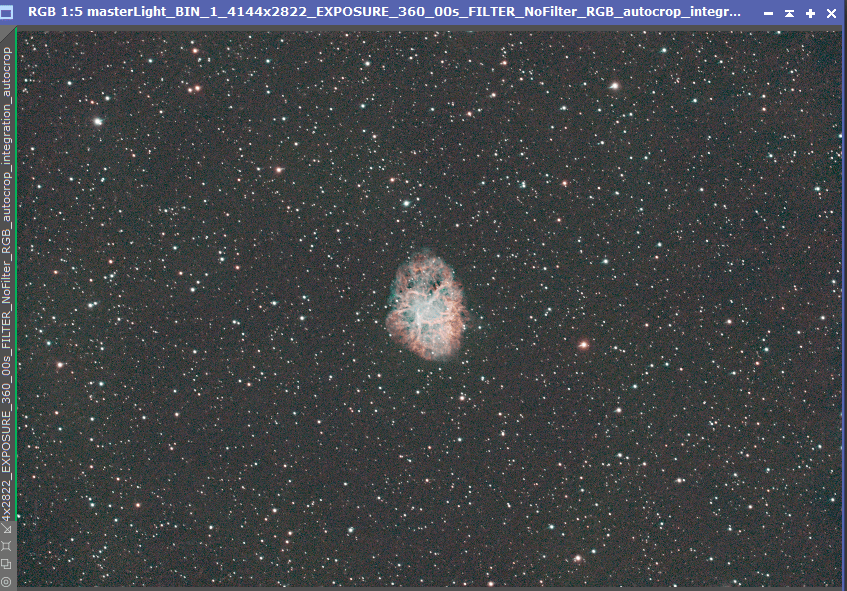
Next up is the SpectroPhotometric Color Correction. This will calibrate the green and general color balance. If you are going to use GraXpert, you can use it before color correction, although there is debate on whether it’s better to color correct first. SPCC is mandatory for the MSGC. For the SPCC tool, I generally find the default values to be good, however it is important select the filters that were used, in this case the Optolong L-eNhance. Below is the image after application of SPCC, looking much more like an actual image.

It is also mandatory to apply Spectophotometric Flux Calibration for MSGC, you can skip this for GraXpert. Again the default values and correct filters need to be selected. I’m not entirely sure, but I from what I understand the gray filter value doesn’t matter if it’s a color camera. So I select the L-eNhance curves for the RGB values, and use the values for similar camera to mine, the ASI 183MC pro.
Now it’s time for the actual background extraction with MSGC. Again the defaults are mostly good here, except that I find it is usually useful to use a smaller gradient scale value, usually 256. You can see the result below, a much improved image next to a view of the removed background.

Star Clean Up & Removal
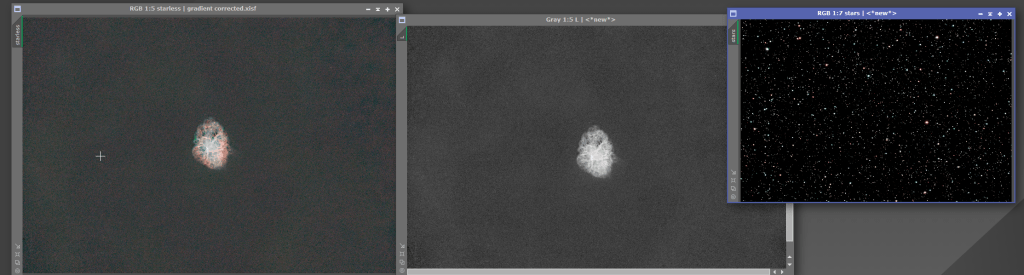
The next part is straightforward and invariably the defaults on these tools are acceptable. If you look closely at my image, my backfocus was slightly off, and the stars at the edges get a little bit of a vortex effect. BlurXterminator cleans this up nicely, as well as shrinks the stars a little bit. I run this twice, first in “correct only” mode, and then in standard mode. Then I use StarXterminator to remove the stars, making sure to check the “screen stars” & “generate star image” boxes. This is where StarNet++ could also be used as acceptable alternative. You will now have a starless and star image.
Stretching
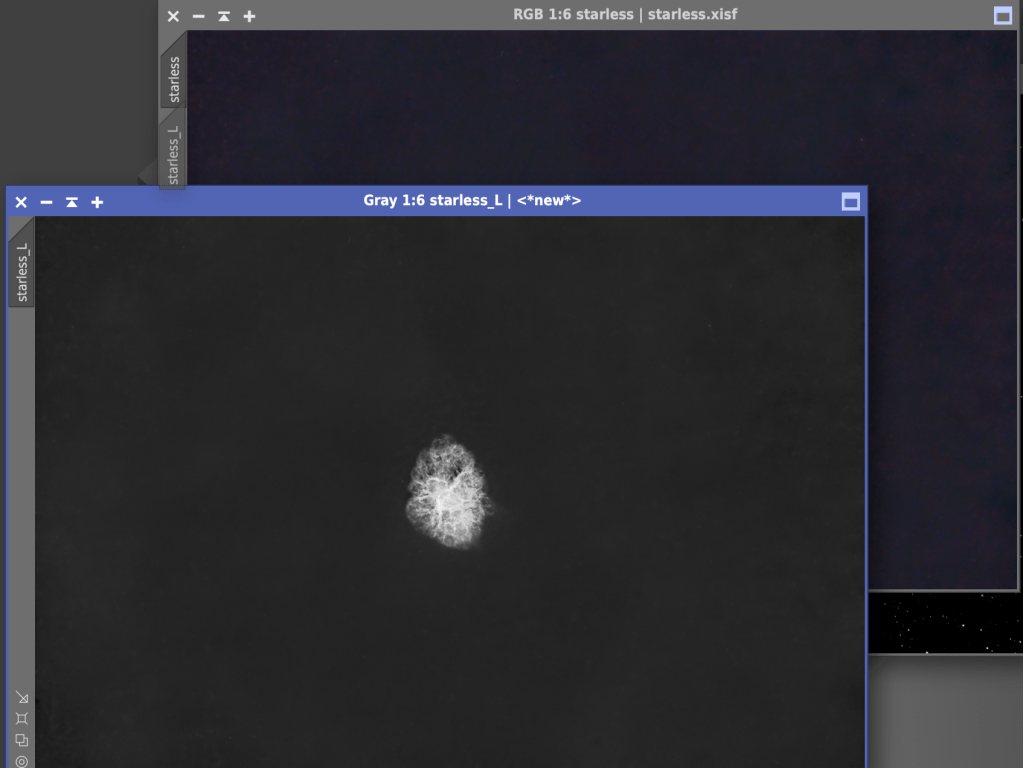
After the star removal you will be left with 2 images, the starless and the stars. We will actually need a third layer, the luminence, for use in our next step. You can extract the luminence layer from using the Image>Extract>Lightness (CIE L*), there is also a button in the standard toolbars to do this. You will now have three images to that need to be stretched.
Starless Stretch
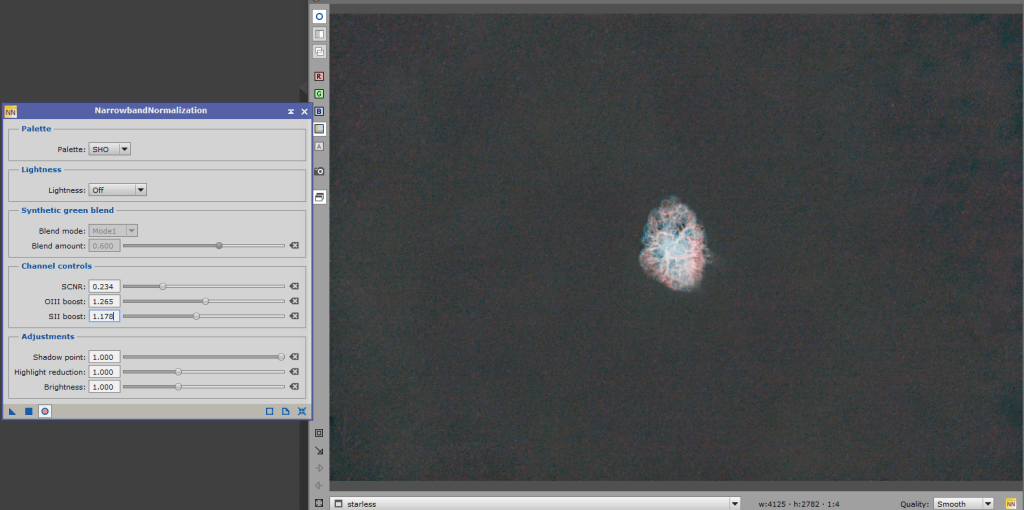
The starless image is the most complicated to get right. At this point you can use the Narrowband Normization tool. For this image I chose the SHO palette, with a little green channel reduction, and some boost for the OIII and SII. Use the preview window (open circle button) to adjust to your taste, this applies for pretty much every tool going forward. Use of the Narrowband Normalization tool is not necessary. Most emission nebulas tend to be pretty red, and I captured this image with a dual narrowband filter, which further emphasis redness. Narrowband Normalization tool gives you some options for creating false color images in standard palettes to separate the effects of the different gases. Sometimes I like the effect, sometimes I don’t, sometimes I prefer the blue and gold, other times the blue and red…there isn’t a wrong answer really, it’s all a personal preference. When you are happy with the result shown in the preview, commit the change with the square button and move on to the stretch.
For the starless image I prefer the GHS strech tool. Another good choice is the Seti Astro Statistical Stretch tool. This tool does and automated stretch, and is quite good, although I usually clean up a little bit after using it. There are many videos and tutorials on stretching so I won’t really cover it here. Then use the curves tool to adjust the saturation. You can overcook the saturation a little bit in this step, because when we do noise reduction the saturation will get knocked back down.

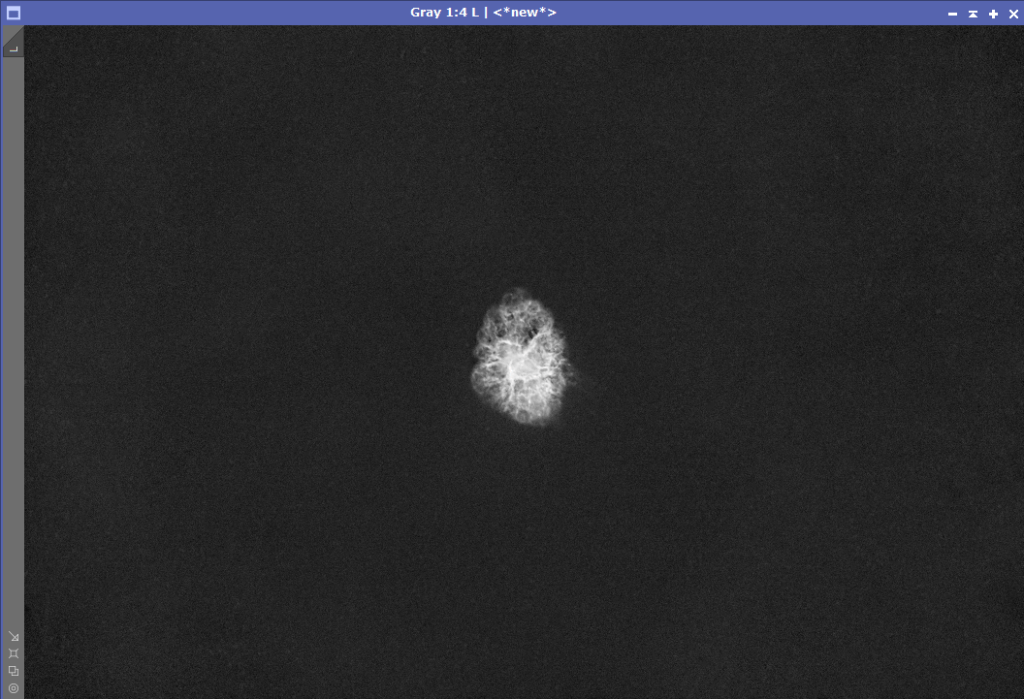
Stretching Luminance and Stars
The remaining images are fairly simple to stretch. I still prefer to use the GHS on the luminence, although the statistical stretch tool did a fine job on this one too.
For the stars, since this was a dual narrowband filter, I used the Seti Astro NB to RGB star combination tool. This tool has an option to stretch the stars and adjust the coloration to a more natural color. It works amazingly well.

Now all three images are stretched, we can move on to noise reduction.
Noise Reduction
This is one of key steps in my workflow, and it is a little counter intuitive. When we look at images, our eyes rely heavily on color to distinguish features. In PixInsight, we use the LRGB combination tool to merge the luminance with color image, it will use the luminance to define the brightness and features, and use the color to “paint” the image. We can take advantage of this, to apply the noise reduction and sharpness to the luminance, then slightly blur the color image, and use it to color the denoised features in the luminance layer. It’s a little counterintuitive, but this technique works best if the color image is blurred, so we’ll use the convolution tool, usually I crank it up to about 4, as shown below.

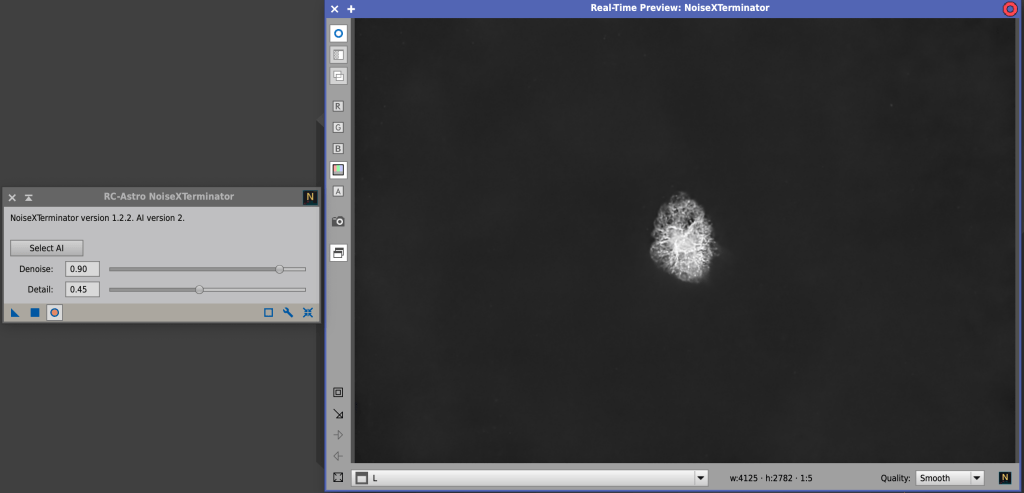
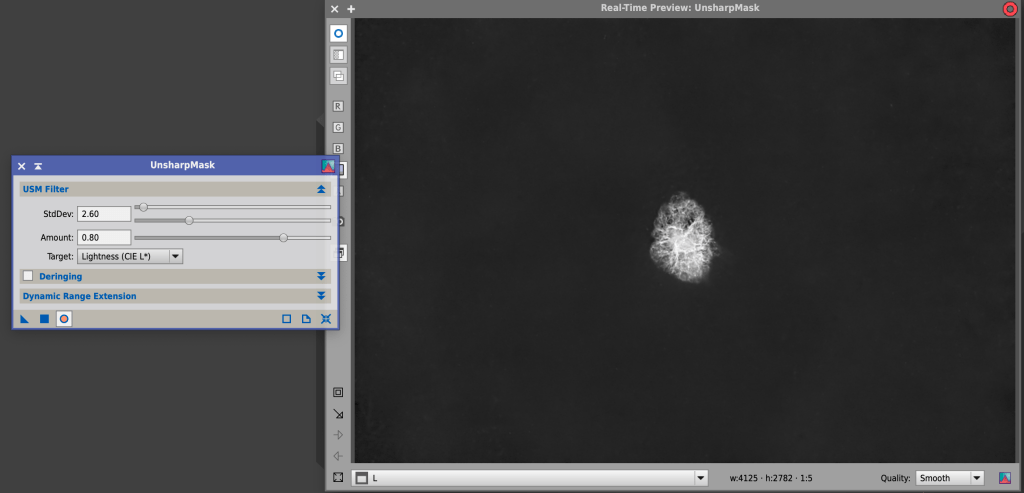
So next up is NoiseXterminator. I do find it helpful to use the preview, and I usually end up somewhere around .8 to .9 for the Denoise and around .4 to .45 for the detail. Commit the change and move on to another tool called Unsharp Mask
I find the Unsharp Mask tool to be very aggressive, sometimes I skip it, but if I apply it, I usually use no more than 3.5 in the StdDev. Apply that and move on to LRGB Combination.
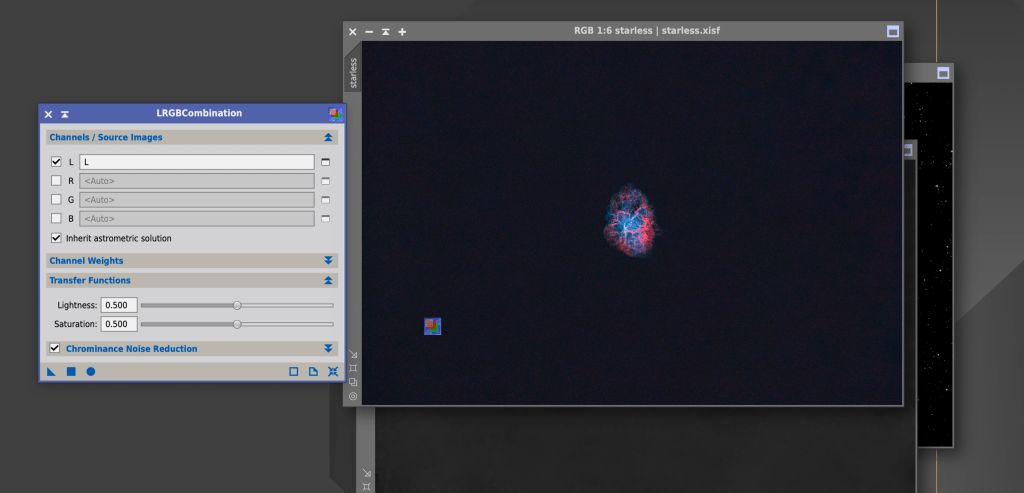
To use the LRGB Combination, set it up like shown in the below image. Uncheck RGB, have L point to the luminance file, inherit the astronomical solution, and I usually reduce the chrominance noise. Then you can simply drag the small blue triangle over the starless image to apply.
Here’s the combined image.

The saturation has been reduced, so at this point it’s best to extract a new luminance layer from the combined image and apply it as a mask. The easiest way to apply the mask is to click and drag the name of the luminance layer to directly below the name of the target image as shown in the below image. W
Now use the curves tool to adjust the saturation to taste on the masked image. The mask will prevent the dark background from picking up color noise artifacts. When this is complete we are ready to finish up the image.
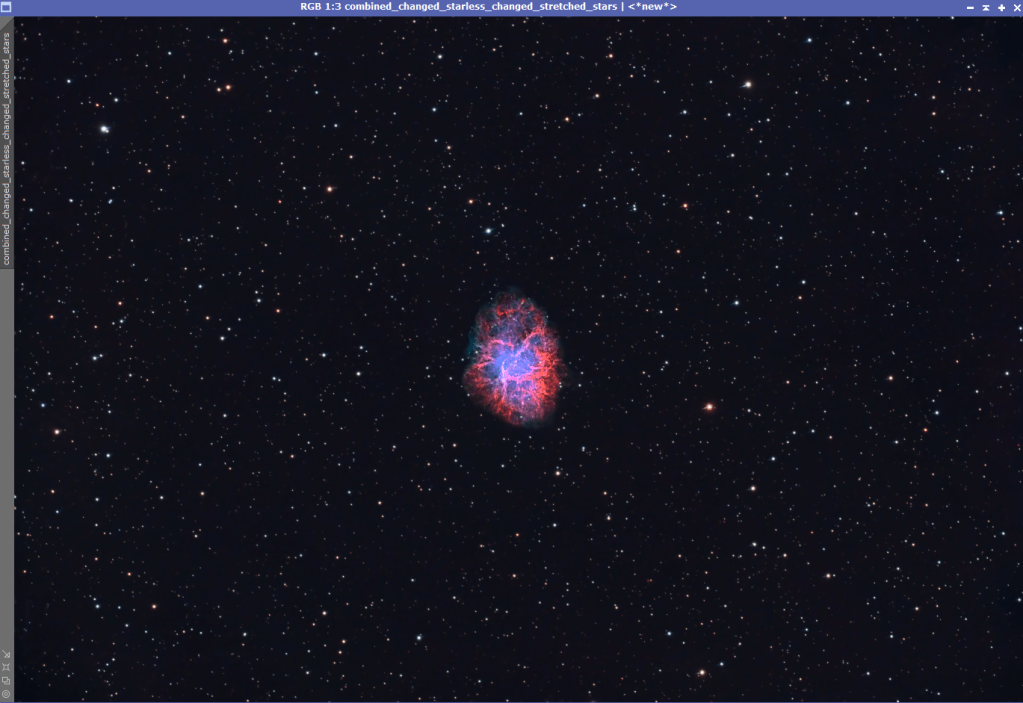
Star Recombination and Final Edits
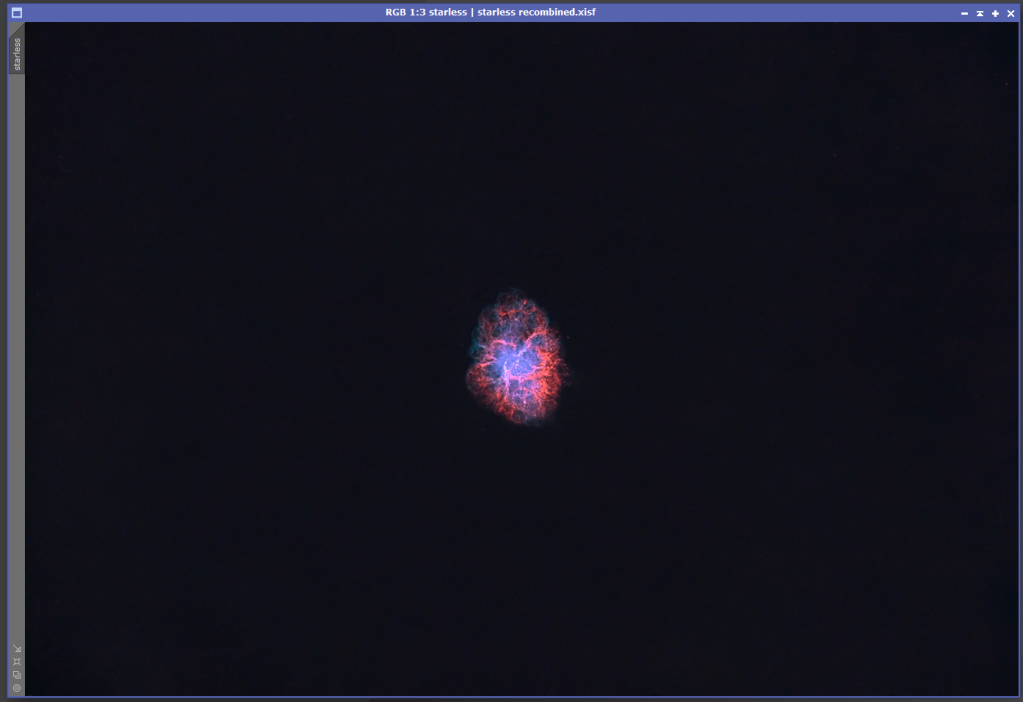
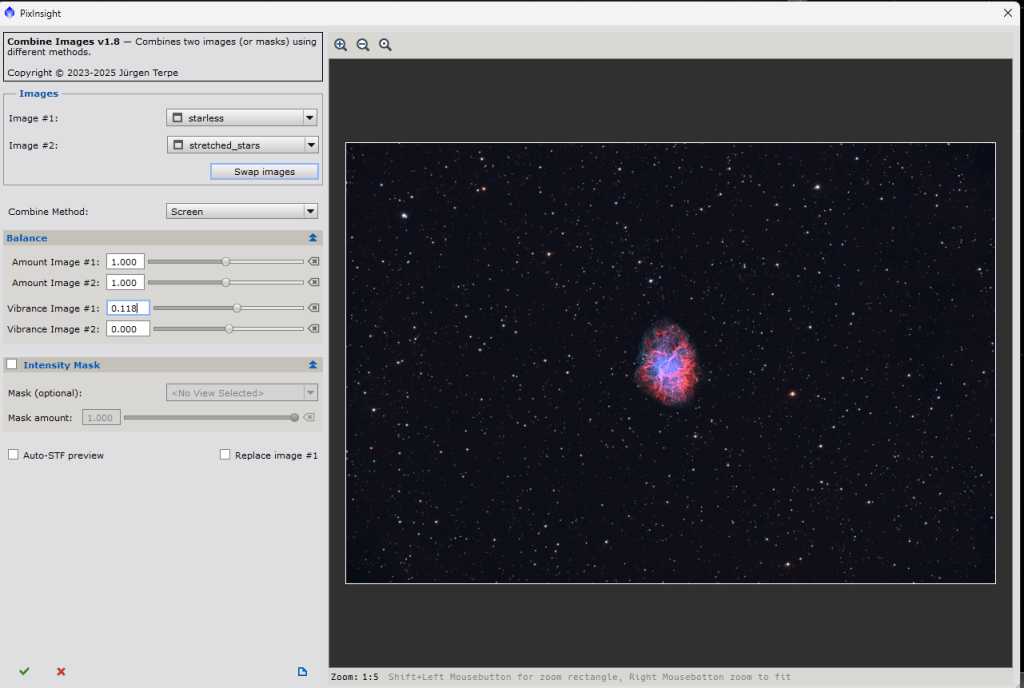
We are now ready to add back in the stars. We stretched them in the previous step. For this I use the combine images tool from the PixInsight Toolbox. This is a free plugin to PixInsight, and is easier than using PixelMath. This tool gives a preview of the combined image, and allows you to adjust the intensity of the respective images. I chose to bump up the vibrance of the nebula slightly. For the stars, I’m using the Narrowband to RGB stretched stars from a few steps ago.
After that tool is executed, I run one final denoising step. I do this by extracting a new luminace layer on the combined image and applying it as a mask. I then invert the mask, so the luminance is protected. I then run TGV denoise on the masked image.

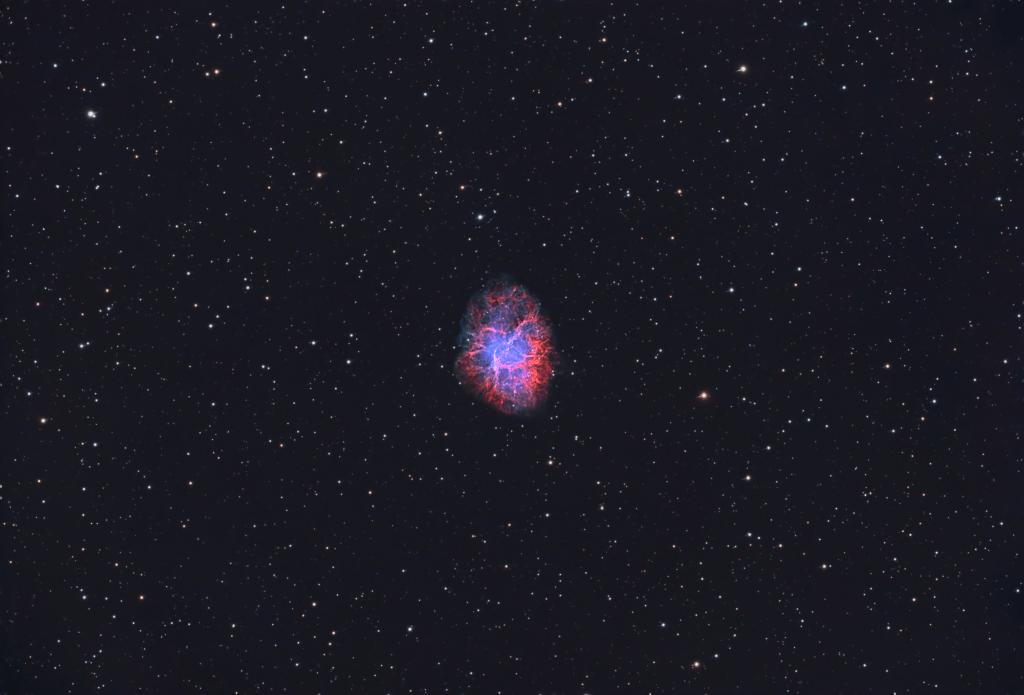
And that’s it. Final product below: